VideosDITA Editing
Table of Contents
- Introduction00:51
- Insert New Topic00:59
- Insert Table00:35
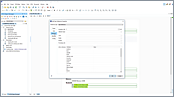
- Insert Image00:23
- Insert Unordered List01:18
- Insert Conref00:39
- Insert WebLink00:29
- Publish to PDF00:32
- Publish to WebHelp Responsive00:43
Overview
Duration: 06:28
This demonstration shows how the Oxygen DITA Editor allows users with
limited knowledge of XML to edit DITA documents in a similar way as a regular word
processing application.
Transcript
00:00:06In this video demonstration, we will show
you how easy it is to work with DITA documents
00:00:11in the Author visual editing mode and present
some of oXygen's unique and useful DITA editing
00:00:18features.
00:00:19The visual DITA Editor in oXygen allows users
with limited knowledge of XML to edit DITA
00:00:26documents in a manner that is similar to working
with a regular word processing application.
00:00:31To demonstrate this, our use case requires
that we add a new topic to an existing DITA
00:00:37documentation project of a mobile phone product.
00:00:41We'll use the Author visual editing mode to
create a new topic, edit it, and publish it
00:00:47in PDF and WebHelp Responsive formats.
00:00:52Our documentation project is organized in
a DITA map that is currently opened in the
00:00:57DITA Maps Manager view.
00:00:59We'll add our topic at the end of the first
chapter.
00:01:03The goal of the topic is to present general
information about a phone model, so we'll
00:01:09name it General Presentation.
00:01:14A whole set of DITA-specific actions are automatically
added on the toolbar when the DITA file is
00:01:20opened in Author mode.
00:01:22For example, there are actions for altering
text appearance or for managing tables and
00:01:29lists.
00:01:30At the beginning of the topic we need a section to list a series of the most common phone buttons.
00:01:37We'll delete the empty paragraph element,
then we insert a new section.
00:01:41The newly added section displays two empty placeholders for a section title and the first paragraph.
00:01:50Now we need a table to present the button
names and descriptions.
00:01:55We do not want to have a title for our table...
00:01:57Now we set the number of rows and columns...
and a fixed column layout.
00:02:03We do not want any cell borders, so we set
the row and column separators to 0.
00:02:11The first two columns contain the button icon
and name, so we can join the first two table
00:02:17header cells.
00:02:21The last column describes the button's function.
00:02:26Now we insert an image representing the button's
icon.
00:02:36Now we insert the button name and apply an
Italic styling.
00:02:42The last column is probably not wide enough to accomodate the content, so we adjust it a bit.
00:02:48Since the button may perform multiple functions,
we'll use an unordered list.
00:02:54For the second function, we'll insert a new
list item.
00:03:01Similarly, we'll add other button descriptions.
00:03:06We just realized that we need an extra row...
so we click the Insert Row button, then add
00:03:11the description of another button.
00:03:21We are not happy with the the column widths,
so we'll adjust them by simply dragging the
00:03:26column borders.
00:03:34Also, we want to change the rows order.
00:03:36To do this, select the entire row, then drag
it to its new position.
00:03:43In the next section, we want to include some
basic technical specifications.
00:03:48We already have the content written in an
HTML page, so we'll copy it from there
00:03:54and paste it in our topic.
00:04:01Notice that the oXygen's smart paste capability
preserved the content styling.
00:04:06Moving on...
00:04:08We'll add a new section that presents the
phone's available colors.
00:04:12We already have a description of the available
colors written in another topic, so we'll
00:04:17use DITA conref mechanism to reuse content
from that topic.
00:04:30The referenced content is displayed with a
darker background to indicate that it is not
00:04:36editable in this context.
00:04:38The link takes you to the document where
the content is stored.
00:04:45At the end of the topic we want to add a link to the phone's website.
00:04:53We just use the "Web Link" action to insert the link.
00:05:00Now we'll add an image that shows the phone's
color choices.
00:05:05This time we'll just drag the image from a
file browser and drop it into our document.
00:05:14Now we want to publish the document in PDF
format.
00:05:17
00:05:22clicks we can obtain a published output.
00:05:29The generated PDF file has a table of contents
with bookmarks to all the chapters and sections.
00:05:36And here is our "General Presentation" topic
that we have just edited.
00:05:45At the end of the demonstration, we also want
to publish our documentation project into
00:05:50a WebHelp Responsive format.
00:05:52Again, we invoke the Configure Transformation
scenario action in the DITA Maps Manager View
00:05:58and choose the WebHelp Responsive transformation.
00:06:01We'll use one of the predefined skins.
00:06:09And this is how the WebHelp Responsive output
looks like.
00:06:20And this concludes our demonstration.
00:06:22Thanks for watching!
Related Videos
|

Use Oxygen Feedback to ask us anything about this video.