How to Use a Local Font in WebHelp Responsive Output
It is possible to use a local fonts in WebHelp Responsive output by
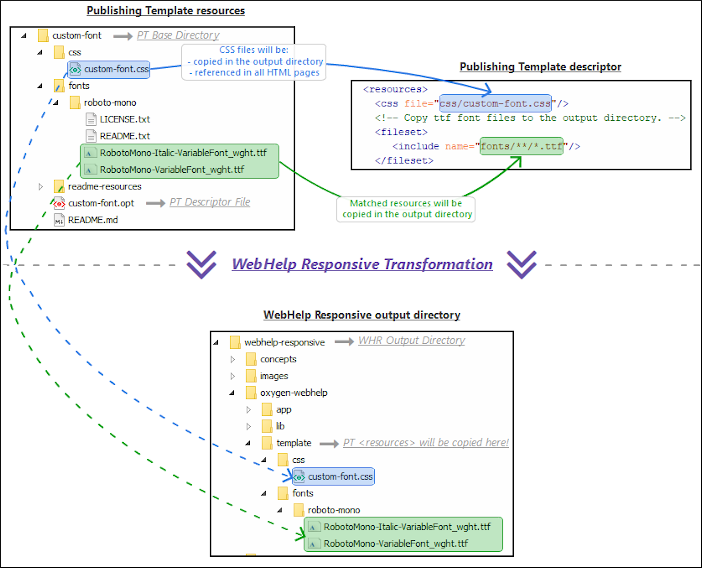
copying the local font file to the output directory through a Publishing Template and
referencing the font files using @font-face rules within a custom CSS.
To use a local font in your WebHelp Responsive output, follow these steps:
- If you have not already created a Publishing Template, see How to Create a Publishing Template.
- Add the local font files to the fonts folder
within your Publishing Template directory structure. For
example:
fonts/roboto-mono/RobotoMono-Italic-VariableFont_wght.ttf
fonts/roboto-mono/RobotoMono-VariableFont_wght.ttf
- Configure WebHelp Responsive to copy the font file to the output
directory. Define a
<fileset>that matches the location of the font files in the<resources>section of your Publishing Template's descriptor file.<resources> <!-- Copy ttf font files to the output directory. --> <fileset> <include name="fonts/**/*.ttf"/> </fileset> </resources>All the files matched by this fileset will be copied to the output directory. The additional resources will be copied in the following subfolder of the output directory:{OUTPUT-DIR}/oxygen-webhelp/template/ - Create a custom CSS file in your Publishing Template
directory.
css/custom-font.css
- Reference the CSS file in the
<resources>section of the Publishing Template's descriptor file. This means that the CSS file will be referenced in each HTML page within the WebHelp Responsive output.<resources> <css file="css/custom-font.css"/> <!-- ... --> </resources>
- Add
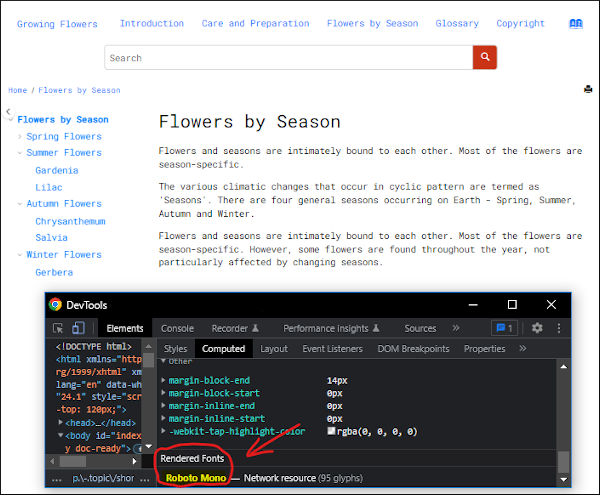
@font-facedefinitions that reference the font files in your custom CSS file. The font files can be referenced using relative URLs since the CSS and the font files included in the Publishing Template package will be copied together in the output folder.@font-face { font-family: 'Roboto Mono'; font-style: normal; src: url('../fonts/roboto-mono/RobotoMono-VariableFont_wght.ttf') format('truetype'); } @font-face { font-family: 'Roboto Mono'; font-style: italic; src: url('../fonts/roboto-mono/RobotoMono-Italic-VariableFont_wght.ttf') format('truetype'); } - Add a CSS rule that applies the custom font on all elements.
body { font-family: 'Roboto Mono', sans-serif; } - Run the transformation with the publishing template selected.