Fluenta DITA Translation Add-on
Introduction
Fluenta is a tool designed to simplify the translation of DITA projects. It parses a DITA map, resolves the references to all topics and subtopics, and prepares a unified XLIFF file that you can send to your Language Service Provider. The Fluenta DITA Translation add-on allows you to manage the Fluenta translation workflow directly from within Oxygen XML Author.
Quick Installation
You can drag the following Install button and drop it into the main editor in Oxygen to quickly initiate the installation process:

Manual Installation
- Go to to open an add-on selection dialog box. Enter or paste
https://www.oxygenxml.com/InstData/Addons/default/updateSite.xml in the
Show add-ons from field or select it from the drop-down
menu.Note: If you have issues connecting to the default update site, you can download the add-on package, unzip it, then use the Browse for local files action in the Install new add-ons dialog box to locate the downloaded addon.xml file.
- Select the Fluenta Dita Translation add-on and click Next.
- Read the end-user license agreement. Then select the I accept all terms of the end-user license agreement option and click Finish.
- Restart the application.
Result: A Fluentasubmenu is now available in the DITA Maps Manager's contextual menu.
Translation Workflow
- Create a Fluenta project. A project contains metadata associated with a DITA map (for example, the languages that the project is translated into). This is a one-time action.
- At various milestones (for example, when a new version is released), you generate XLIFF files for each language you translate to.
- You send the XLIFF file to the translation service provider.
- Once the XLIFF returns from translation, you import the XLIFF file. A translated version of your map and topics will be generated at the selected location from the XLIFF file.
Creating a Fluenta Project
- Open the main DITA map in the DITA Maps Manager.
- Right-click the map and select .Note: This action is visible only if there is no project detected for the open DITA map.
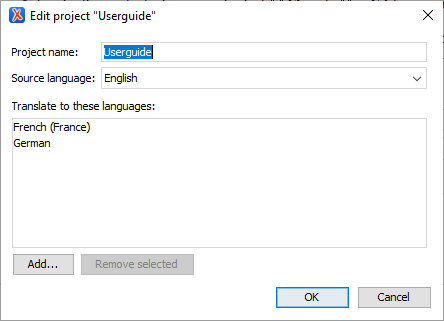
In the resulting dialog box, you need to provide a name for the project and the languages that the project will be translated into.

Result: A translation memory with the same name as the project will automatically be created. Also, only one project can be created for a DITA map file. Once created, you will be able to edit it to change certain information.
Generating XLIFF Files
- Open the main DITA map in the DITA Maps Manager.
- Right-click the map and select .Note: This action is visible only if there is a Fluenta project associated with the current DITA map and the XLIFF files will be generated for this project.
In the resulting dialog box, select the output folder where the XLIFF file(s) will be generated and the languages that you want to send to translation.

-
Selecting the Use translation memory option will use the translation memory associated with the project to recover translations for the segments not yet translated. Selecting the Reuse ICE matches option will compare current content with the content translated in the past and reuse all existing translations.
Result: An XLIFF file will be generated in the output folder for each selected language.
Importing XLIFF
- Open the main DITA map in the DITA Maps Manager.
- Right-click the map and select .Note: This action is visible only if there is a Fluenta project associated with the current DITA map and the XLIFF file will be imported for this project.
In the resulting dialog box, browse for the XLIFF file:

-
Selecting the Accept unapproved translations option will use translations that are not marked as approved in the XLIFF file being imported. Selecting the Update "{MemoryName}" translation memory option will store the imported translations in the project translations memory.
Editing a Fluenta Project
- Open the main DITA map in the DITA Maps Manager.
- Right-click the map and select .Note: This action is visible only if there is a Fluenta project associated with the current DITA map and this project will be edited.
In the resulting dialog box, you need to replace the project information you want updated.
Managing Translation Memories
- Open the main DITA map in the DITA Maps Manager.
- Invoke the contextual menu and select .
In the resulting dialog box, you will see a table with all the translation memories defined in Fluenta.
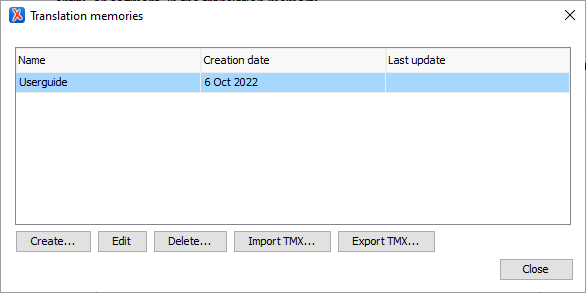
- In this dialog box, you can perform the following operations:
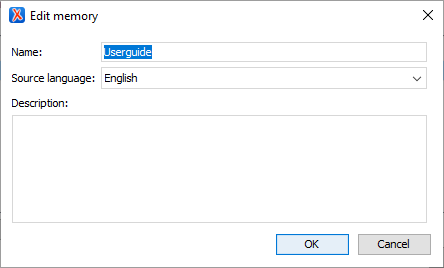
Create - This action will open a dialog box for creating a new translation memory.

Edit - This action will open a dialog box for editing the selected translation memory from the translation memories table.
-
Delete - Deletes the selected translation memory. If a translation memory is associated with a project, it cannot be deleted.
-
Import TMX - Populates the content of the translation memory with content from a specified import file.Note: One or more files can be imported into a translation memory.
-
Export TMX - Exports the selected translation memory to TMX format to view its content and use at a latter time.
Preferences
- Open the main DITA map in the DITA Maps Manager.
- Right-click and select .
Result: In the resulting dialog box, you will see the Fluenta Addon preferences page:
Figure 1. Fluenta Addon Preferences Page 
- Configure options as needed. You can set the folders where projects and translation memories will be saved. Both absolute paths and paths that contain editor variables can be used. Also, you can set some target languages that will be pre-filled when a Fluenta project is created.