Insert Reference Dialog Box
The Insert Reference dialog box allows you to insert and configure references in DITA maps. There are numerous types of references that can be inserted into maps. They include references to topics, other maps, glossary terms, and keys. You can also use this dialog box to configure the attributes of a reference, add profiling or metadata, and define keys.
- Select
 Reference,
Reference to the currently edited file, or any of the other
specific reference actions that are available from the Append
Child, Insert Before, and Insert
After submenus when invoking the contextual menu in the DITA Maps
Manager.
Reference,
Reference to the currently edited file, or any of the other
specific reference actions that are available from the Append
Child, Insert Before, and Insert
After submenus when invoking the contextual menu in the DITA Maps
Manager.- To insert the reference as a child of the current node, select the reference from the Append Child submenu.
- To insert the reference as a sibling of the current node, below the current node in the map, select the reference from the Insert After submenu.
- To insert the reference as a sibling of the current node, above the current node in the map, select the reference from the Insert Before submenu.
Note:The content of these submenus depends on the node that is selected in the DITA map tree when the contextual menu is invoked. For example, if the selected node is a topic reference (<topicref>), its possible child nodes include the following elements:<anchorref>,<chapter>,<keydef>,<mapref>,<topicgroup>,<topichead>,<topicref>,<topicset>, and<topicsetref>. - Click the Insert
Reference button on the DITA Maps Manager extended
toolbar. This action will insert the reference as a sibling of the current node (below the
current node in the map).
- Select Insert Reference from
the DITA Maps menu. This action will insert the reference as a
sibling of the current node (below the current node in the map).
For the Reference or
Reference to the currently edited file actions, a
Reference type drop-down list is displayed at the top of the
Insert Reference dialog box and you can select the type of reference
you want to insert. Depending on the place where the reference will be inserted, Oxygen XML Author will propose only valid reference types. When you change the reference
type, the fields in the various tabs of the dialog box are reconfigured depending upon the
availability of the associated attributes. For the other reference actions in the
Append Child, Insert Before, and
Insert After submenus, the reference type is automatically chosen
based upon the invoked action and you cannot change it.
The main section of the dialog box includes the following tabs: Target, Keys, Attributes, Metadata, and Profiling.
Target Tab
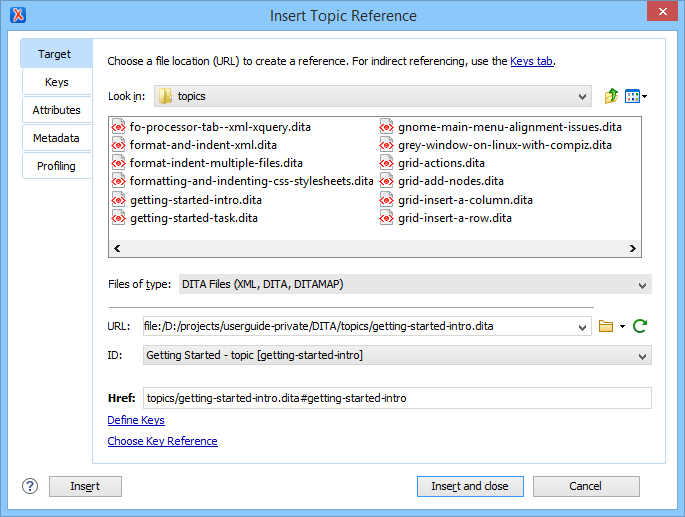
- Choose a file location section
- You can browse for and select the source target file by using the Look in drop-down list, browsing buttons, or file window in this section. You can use the Files of type drop-down menu to narrow the list of possible file types that will be displayed.
- URL
- Displays the path to the target and allows you to select or change it by using the combo box or browsing buttons.
- ID
- The drop-down list displays all of the target elements that are available for the selected target URL.
- Href
- The selected target automatically modifies this value to point to the corresponding
@hrefattribute of the target element.Note:If the Reference type is a Navigation Reference, the Href field is changed to Mapref, since a<navref>element requires a@maprefattribute instead.
Keys Tab
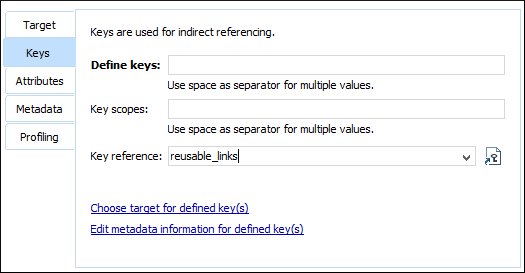
The Keys tab allows you to use and define keys for indirect referencing. For more information, see Working with Keys in DITA. This tab includes the following:
- Define keys
- Use this text field to define the
@keysattribute for the target. - Key scopes
- Use this text field to define or edit the value of a
@keyscopeattribute. Key scopes allow you to specify different sets of key definitions for different map branches. - Key reference
- Instead of using the Target tab to select a file that
contains the target reference, you can reference a key definition by using this text
field. Use the
 Choose key
reference button to access the list of keys that are already defined in
the current root map.
Choose key
reference button to access the list of keys that are already defined in
the current root map.
Attributes Tab
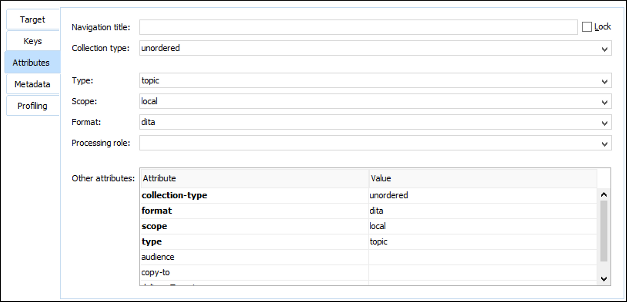
The Attributes tab of the Insert Reference dialog box allows you to insert and edit attribute values for the target reference. This tab includes the following sections and actions:
- Navigation title
- This text field allows you to specify a custom navigation title
for the target reference. If you want this attribute to always be populated with a
detected value (based on the specifications for the target file), select the
Navigation title checkbox for the Always fill values for attributes option in the
DITA preferences page. For references to DITA
resources, you can enforce the use of the specified title by selecting the
Lock checkbox (otherwise, the topic
<title>takes precedence). - Collection type
- This drop-down list allows you to select the
@collection-typeattribute to create hierarchical linking between topics in a DITA map (for example,unordered,sequence,choice,family,-dita-use-conref-target). - Type
- Allows you to select a
@typeattribute (such astopic,task,concept, etc.) for the target element. If you want this attribute to always be populated with a detected value (based on the specifications for the target file), select the Type checkbox for the Always fill values for attributes option in the DITA preferences page. - Scope
- This property corresponds to the
@scopeattribute of the target element. It is populated automatically, based on the selected file type, unless its value for the selected target file is the same as the default attribute value. If you want this attribute to always be populated with a detected value based on the specifications (regardless of the default value), select the Scope checkbox for the Always fill values for attributes option in the DITA preferences page. - Format
- This property corresponds to the
@formatattribute of the target element. It is populated automatically, based on the selected file type, unless its value for the selected target file is the same as the default attribute value. If you want this attribute to always be populated with a detected value based on the specifications (regardless of the default value), select the Format checkbox for the Always fill values for attributes option in the DITA preferences page. - Processing Role
- This drop-down list allows you to set the
@processing-roleattribute to one of the allowed values for DITA reference elements (for example,resource-only,normal,-dita-use-conref-target). - Other attributes table
-
This table contains the attributes that are available for the selected reference. You can use this table to insert or edit the values of any of the listed attributes. Clicking a cell in the Value column allows you to use the combo box to enter, edit, or select attribute values.
Metadata Tab
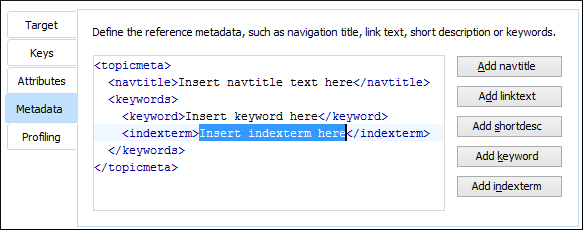
The Metadata tab allows you to add metadata elements to the target
reference. Use the buttons on the right side of the tab to insert specific metadata
elements (you can add the following metadata elements: <navtitle>,
<linktext>, <shortdesc>,
<keyword>, <indexterm>). The metadata
elements are inserted inside a <topicmeta> element. The editing
window allows you to easily insert and modify the content of the metadata that will be
inserted.
Profiling Tab
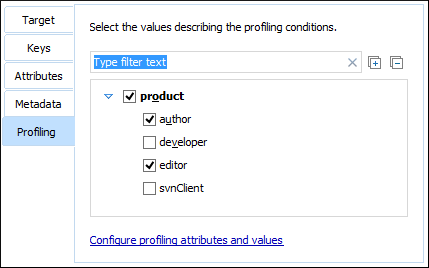
- If your root map references a DITA subject scheme map that defines values for the profiling attributes, those values are used.
- If your project defines project-level configuration values for the profiling attributes, those values are used.
- If Oxygen XML Author defines global-level configuration values for the profiling attributes, they are used.
- Otherwise, a basic default set of profiling attributes and values are used.
When you modify a selection of values in this tab, the change will also automatically be reflected in the Attributes tab. For more information, see DITA Profiling / Conditional Text.